
Last updated November 17, 2026
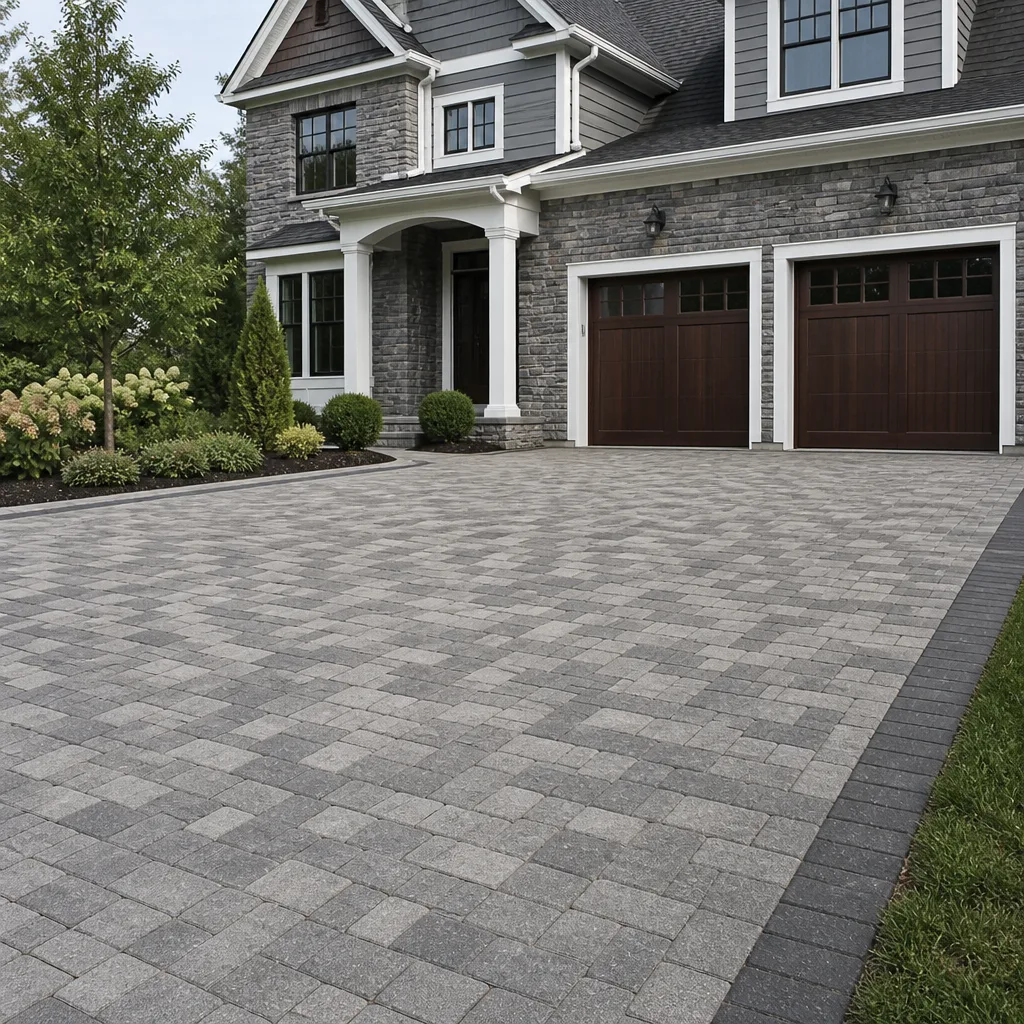 Driveway & pavers
 Kitchen remodeling
 Bathroom remodeling
 Home additions & ADU
 Roofing
 Windows & doors
 Fence
Free written scope consultation - allowances, timeline, and change-order rules on paper before a single trade is scheduled
Driveway & Pavers Troubleshooting: Common Problems and How to Fix Them
A single sunken paver and a whole sinking paver field look almost identical from the street. One is a $40 fix you can do on a Saturday. The other is a $4,000 base failure that will keep eating pavers until someone rebuilds what’s underneath. Most driveway paver problems aren’t random bad luck – they’re the predictable result of one of five installation shortcuts, and knowing which shortcut caused your problem tells you exactly how serious the fix needs to be. This guide teaches you to diagnose before you spend a dollar. We’ve seen every one of these failures on Antioch driveways, and the pattern almost always points back to the same handful of mistakes.
Quick Answer
Sinking, rocking, or weed-filled pavers are usually caused by one of five things: a base that wasn’t compacted deep enough, missing or failing edge restraint, washed-out polymeric sand, water draining toward the pavers instead of away, or tree roots pushing up from below. You can tell the difference with a tap test, a hose test, and a close look at the edges. Surface settling is a cheap fix; base failure is not, and mistaking one for the other is how homeowners waste money on repairs that never hold.
Styles & brands we work with
- Kitchen remodeling
- Bathroom remodeling
- Home additions & ADU
- Roofing
- Windows & doors
- Driveway & pavers
- Fence
Table of Contents
- How to tell surface settling from base failure (the tap test)
- Why edge pavers fail first
- Polymeric sand washout vs. weeds vs. ant colonies
- Reading crack patterns: tree roots, freeze-thaw, and overload
- Water pooling and drainage problems
- When a repair is a Band-Aid and when it buys real time
- Repair costs and what Antioch homeowners actually pay
- Common mistakes to avoid
How to Tell Surface Settling from Base Failure
This is the single most useful skill in paver troubleshooting, and it takes about ten minutes. Surface settling means the pavers themselves have shifted slightly on a base that’s still solid. Base failure means the compacted gravel layer underneath has lost its structure – it’s too shallow, wasn’t compacted in lifts, or has been undermined by water. From a distance the two look the same. Up close, they don’t.
Here’s the sequence we recommend to every Antioch homeowner who calls about a sinking driveway:
- The tap test. Tap each suspect paver with the handle of a screwdriver or a small mallet. A dull, solid thud means the paver is still seated. A hollow ring or a hollow thump means there’s a void underneath – the paver is bridging a gap, and the base has moved.
- The rock test. Press down hard on one corner of the paver with your foot. If it rocks and you can see daylight shift under an adjacent joint, the setting bed is gone, not just the sand in the joints.
- The water test. Run a hose on the low spot for two full minutes. If water sits and slowly drains straight down (you’ll see the sand joint darken in a circle), the base has a void and is taking water like a drain. If water sheets off to the sides, you’ve got a drainage grading problem feeding the sink.
- The neighbor test. Look at the pavers two feet in every direction. One or two loose pavers surrounded by tight ones means localized settling. Five or more in a widening bowl shape means the base under the whole zone is compromised.
In our experience around Antioch, most one-paver sinks are from a localized water hit – a downspout dumping onto the driveway, or a hose bib dripping in the same spot for years. Most multi-paver bowl-shaped sinks are base failure from an under-excavated driveway: the installer dug four inches when the soil and traffic load needed six to eight. The difference matters because one is a $40 reset and the other is real reconstruction.
Why Edge Pavers Fail First
Look at any paver driveway and check the outermost row along the grass, the curb, or the garage apron. If those pavers are walking outward, tilting, or loosening, you’ve just learned something important about the original install: the edge restraint is missing, undersized, or has failed.
Pavers are held in place by something called interlock – they press against each other and against a fixed border. The border is the edge restraint, usually a spiked plastic channel or a poured concrete curb. Without a solid edge, every car tire rolling over the field drives the pavers outward like a slow wave. The edges go first, joints open, sand washes out, and eventually rain gets under the field and the base starts to fail.
What the edge failure pattern tells you:
- First two rows spreading but the rest tight: the restraint has lost its spikes or was never spiked deep enough. Fixable without tearing up the field.
- Entire perimeter spreading in a fan: no edge restraint was installed at all, or it was just a strip of plastic sitting on top of the soil. The installer skipped the most important line of defense. Expect base issues to follow.
- Pavers tilting into a soft spot near the garage: the transition from driveway to garage slab was never detailed correctly, and water has been getting into that seam for a season or more.
- One edge fine, opposite edge failing: water is running off one high side and undermining the low side. Grading issue feeding an edge failure.
Antioch’s heavy clay soils are unforgiving on a bad edge detail. Clay swells in the wet season and shrinks in the dry, and a driveway with a weak restraint will visibly loosen more by February than it did in September. If your driveway has been in place five or more years and the edges are still tight, whoever installed it did that part right.
Polymeric Sand Washout vs. Weeds vs. Ant Colonies
Open joints get blamed on everything. They’re actually three different problems with three different fixes, and treating them as one is why homeowners keep filling the same joints every spring. Diagnose before you buy a bag of sand.
Polymeric sand washout
Look at the joint after rain. A clean, hollow channel with hard crusted sand at the bottom of the joint or on the driveway surface below means the polymeric sand has broken down. It happens for two reasons: the sand was swept in wet, or the pavers got too much water before the polymer cured. Once polymeric sand fails it doesn’t come back – you have to dig it out and refill. One detail that catches homeowners: if the washout is concentrated in one area, water is crossing that spot fast, and refilling without fixing the drainage is a waste of the sand.
Weed infiltration
Weeds sprouting from joints mean organic material has gotten in – dirt, seed, decomposed sand. Weeds love the joint because it holds moisture and warmth, which is why a weedy joint is usually a wide joint. Pull one and check the width. If it’s wider than a pencil, sand was never the issue: the pavers have drifted and you need to fix the interlock, not the sand.
Ant colony undermining
This one fools a lot of homeowners. You’ll see small mounds of fine sand sitting on the pavers, especially near the edges of the drive, and minor settling that gets worse every summer. That’s not sand washing out – ants are excavating the setting bed and depositing it at the surface. It’s easy to miss because the mounds are small and easy to sweep away. Check for them after a warm, dry week. If you see mounds recurring in the same spot, the ants have a colony under the field, and no amount of joint sand will fix it until the nest is treated.
Reading Crack Patterns: Tree Roots, Freeze-Thaw, and Overload
Pavers themselves don’t usually crack – they break from something happening beneath or above them. The pattern tells you which. Cracked pavers are the most expensive kind of paver problem because the cost of a crack is usually the cost of whatever caused it.
Tree root intrusion
Root damage shows as a heave pattern: several pavers lifted in a line, often with a shallow crack across one or two that have been pushed up at an angle. Walk the driveway in line with the nearest large tree and see if the lift follows the root line. In Antioch, where mature sycamores and oaks line plenty of the older streets around downtown and the riverfront neighborhoods, root heave on a paver driveway can happen suddenly in a wet spring when roots push up as they search for water. Cutting the root is the tempting fix, and it usually kills or destabilizes the tree. The better fix is a root barrier or an engineered solution that lets the paver field move slightly without cracking.
Freeze-thaw damage
Antioch doesn’t see hard freezes often, but the mild overnight dips in January and February still cause freeze-thaw cycling when water is trapped in joints or under the pavers. The pattern is a series of small cracks scattered across the field with slightly lifted pavers around them, often worst on north-facing sections that stay shaded and hold moisture. Late-season water trapped under the driveway makes this worse – fix the drainage and the crack pattern stops growing.
Weight overload
Weight overload cracks look different: long, single cracks following a wheel path, or pavers crushed at the corners. This is the pattern we see on driveways somebody decided to use as a parking pad for a motorhome or a loaded trailer. Paver driveways handle cars and trucks fine when the base was built to spec. They don’t handle a fifth-wheel trailer parked in the same spot for months. Once the pavers are cracked from point load, replacing them is easy – but if the base was compressed under the parking spot, the new pavers will break again unless the base is fixed too.
Water Pooling and Drainage Problems
Water is the root cause behind most of the failures in this guide. Pavers are permeable at the joints, and any low point in a paver field becomes a funnel. If you’re seeing standing water in the same spot after every rain, the driveway is telling you where its base is failing.
In Antioch, the wet season from November through March puts a decade of base problems on display in a few weeks. Our clay-heavy soil drains slowly when it’s saturated, so a driveway that looks fine in July can be a pond in January. Three common water problems and what they mean:
- Water pools at the edges of the driveway and drains slowly: the paver field is sitting in a shallow dish. The surrounding grade is too high, or the subgrade was never dished to move water off. Regrading and a perimeter drain channel fix the source.
- Water pools in the middle of the field: the base has settled in that area. The water will keep finding that same low point and hollowing it out further, which is why one wet winter makes the middle sink visibly worse by spring.
- Water sheeting off the driveway toward the house or garage: the slope was never cut correctly, or the pavers have shifted over time. This is a code and safety issue, not just a cosmetic one – water against the foundation is a much bigger repair than regrading a driveway.
One more detail worth checking: your roof gutters. About a third of the driveway sinks we see in Antioch trace back to a downspout landing on the paver field or on the edge restraint. Extending the downspout four feet past the driveway is cheap and it solves a problem that no base repair will solve on its own.
When a Repair Is a Band-Aid and When It Buys Real Time
Not every repair needs to be a rebuild, and no honest contractor will tell you it does. Here’s how we think about repair honesty, failure by failure, so you can make the same call yourself.
Localized settling (one to three pavers). A reset is real, not a Band-Aid – lift the pavers, level the setting bed, reset, re-sand, done. It holds as long as nothing keeps dumping water on that spot. If you don’t find the water source, the reset lasts one season. A reset buys real time when the drainage gets fixed too.
Edge restraint failure. Replacing or rebuilding the edge restraint is a proper fix that holds for 10-15 years if done correctly. This is genuinely worth the money. Skipping it and just re-sanding the joints is a Band-Aid that will not hold.
Polymeric sand washout. Refilling is a Band-Aid if the sand failed because the base is holding water. Digging out and refilling with the correct polymeric sand after fixing the drainage is the real repair.
Ant undermining. Treating the colony is a real fix. Refilling sand without treating it is a Band-Aid – the ants will excavate it again within a season.
Base failure over a 5×5 area or larger. Spot-repairing pavers over a failed base is a Band-Aid, period. The pavers will settle again because the compaction is gone. On a small enough area we sometimes recommend a spot rebuild – lift pavers, remove and replace base within a defined zone, compact, reset. Anything larger is a full rebuild of that section. It costs more, and it’s the only repair that stays put.
Cracked pavers from tree roots. Replacing the cracked pavers is a Band-Aid if you don’t address the root movement. A tree root fix is the real repair, and depending on the tree, it sometimes involves a landscape contractor or arborist alongside the paver work.
Repair Costs and What Antioch Homeowners Actually Pay
Cost depends almost entirely on which of the five failure types we’ve been discussing you’re dealing with. Here’s the honest local picture, based on what paver repairs run in the Antioch market:
| Repair | Typical Cost Range | Realistic Lifespan |
|---|---|---|
| Reset one to three settled pavers | $150 – $350 | Holds if the water source is fixed |
| Rebuild edge restraint (perimeter) | $400 – $900 | 10-15 years if built correctly |
| Dig out and replace polymeric sand | $300 – $700 for a standard drive | 4-7 years before normal refresh |
| Ant colony treatment and re-sand | $150 – $400 | Permanent if the treatment is thorough |
| Replace cracked pavers | $250 – $600 depending on count and pattern | Holds only if root or weight cause is resolved |
| Spot base rebuild (5×5 or smaller) | $800 – $2,000 | 15+ years if compacted to spec |
| Full base rebuild of a section | $8 – $20 per square foot | 20+ years if built to current standard |
Two local factors push the Antioch numbers where they are. Clay soil means base repair takes longer and more excavation than the same footage in a sandy market. And the older stretches of town – the neighborhoods off A Street and along the river – sometimes have driveways built on top of old soil that never got proper subgrade preparation, which is why full-section rebuilds happen more often there than on newer construction out toward Lone Tree Way.
Groundwork Construction Co. of Antioch offers no-hassle upfront pricing on paver repairs in Antioch. The number you see on the written quote is the number you pay. We don’t do change orders after the work starts, and every repair is covered by our 730-Day Done Right Promise – one of the longest workmanship guarantees in the residential construction space. If any part of the repair fails within that window, we make it right.
Common Mistakes to Avoid
- Filling the joints with regular masonry sand. Polymeric sand is not a suggestion. Regular sand washes out in the first wet season in Antioch’s clay-heavy soil, and the joints you’re trying to protect will be open again by February.
- Resetting a sunken paver without finding the water source. Ninety percent of one-paver sinks come from water landing in the same spot every storm. Reset without redirecting the water, and you’ll be resetting the same paver in a year.
- Cutting tree roots to fix a heave. Roots that lifted your pavers are anchors for the tree. Cutting them destabilizes the tree, and it usually makes the paver problem worse over the next two seasons. Root barriers and relocation are the right answer.
- Parking a motorhome or loaded trailer on a paver driveway long-term. Pavers built to residential specs handle cars and trucks. They aren’t built for a fifth-wheel parked in the same spot for months. If you need heavy-vehicle parking, say so before the build.
- Skipping the edge restraint rebuild to save the money. Edge restraint is the cheapest line item on the repair list and the one most likely to protect everything else. Rebuilding the field over a bad edge is a waste of the field.
- Treating a weedy or open joint as a cosmetic issue. Open joints are how water gets into the base, and the base is the expensive part. Every joint problem is a base problem waiting to happen.
- Hiring without a written scope that names the base spec. Two paver quotes can look identical and hide the difference between a 4-inch base and an 8-inch compacted base. That’s the line that decides whether you’re rebuilding in 12 years or 30. Ask what excavation depth and compaction the quote covers before you sign.
See the difference
 Before
 After
 Before
 After
 Before
 After
When to Call a Professional
Some driveway problems are genuinely worth a Saturday morning, and some aren’t. Call a professional if the tap test finds hollow spots across more than three or four pavers in a zone; if the water test shows the base is taking water in a bowl pattern; if you’ve got cracked pavers and a large tree within 15 feet of the failure; if a repair you made two years ago has failed again; or if water on the driveway is running toward the house or garage. Those are the calls where a wrong guess turns a $400 fix into a $4,000 rebuild. Small resets, sand refills, and edge lookouts are things you can handle. Base and drainage work is where an experienced setup saves money.
Groundwork Construction Co. of Antioch offers free estimates in Antioch – call (888) 419-3650. We answer with a live person, 24/7, and every technician is background-checked and arrives in uniform. Our technicians have up to 12 years of experience, and we work with trusted paver partners like Belgard so your repair gets the right material, not just whatever the supplier had on hand.
Frequently Asked Questions
A single sunken paver reset runs $150-$350, while a base rebuild of a failing section runs $8-$20 per square foot. The exact number depends on which failure you have and how much excavation the base needs. Call (888) 419-3650 for an exact quote – estimates are free and we put the number in writing.
No. Our upfront pricing means the number on the written quote is the number you pay. If we find something unexpected under the pavers – a deeper base failure, a hidden root – we stop, show you what we found, and give you a revised quote before any more work happens. We don’t do change orders after the fact.
Yes, if it’s one to three pavers with a solid base underneath. Lift the paver, level the setting bed, reset it, and re-sand the joint with polymeric sand. If the tap test finds hollow thumps under five or more pavers, or if the water test shows the base is holding water, a DIY reset won’t hold – the base is what needs the repair.
A properly rebuilt base with correct compaction and edge restraint lasts 20+ years. A reset without fixing the water source lasts about one wet season before the sink returns. A well-executed polymeric sand refill lasts four to seven years in Antioch’s climate before normal refresh is due.
When a driveway rebuild changes the amount of impervious surface or affects stormwater drainage, permits and inspections are typically required. We handle the permit process and inspections as part of the project scope, so nothing gets flagged after the work is done. Call (888) 419-3650 and we’ll tell you what applies to your driveway before we start.
Some minor widening of joints in the rainy season is normal because the clay soil under most Antioch driveways swells with moisture. Joints that stay open after the wet season, or that grow wider every year, are a sign the edge restraint has failed or the polymeric sand has broken down. Both are fixable, and fixing them early protects the base.
Weeds come back because organic material is trapped in a wide joint – usually because the paver has drifted and the joint is wider than it should be. Pulling the weeds without fixing the joint width just lets them come back. Call (888) 419-3650 and we can tell you whether it’s a sand problem or a paver movement problem.
The Bottom Line
Most driveway paver problems fall into one of five categories: base failure, edge restraint failure, sand washout, weed infiltration, or root and weight damage. The right repair depends on which one you’ve got, and the tap test, water test, and edge inspection tell you the answer in about ten minutes. Get the diagnosis right and you’ll avoid the most expensive mistake in paver repair – rebuilding a field over a base that was going to fail anyway. If you want a second opinion on what your driveway is telling you, we’re happy to look at it. From foundation to finish line, our goal is that you spend the right amount on the right repair once. For a full look at what we do on driveways and hardscape across the area, see Driveway & Pavers in Antioch, and for the home of our local team see the Groundwork Construction Co. of Antioch home page. If walls, shrubs, and gates are on the same plan, our Fence Installation in Antioch work pairs well with hardscape projects, and future expansion – a detached garage, an ADU over the pad – is covered by our Home Additions & ADU in Antioch service line.
Call (888) 419-3650 for a free estimate on your driveway or paver repair in Antioch. A live person answers every call, any hour. Every project is covered by the 730-Day Done Right Promise – if it’s not done right, we make it right. Projects over $10,000 qualify for $1,000 off, and 0% financing for 18 months is available so the number that fits your budget is the number you can act on. Built to last, backed in writing.
Written by the team at Groundwork Construction Co. of Antioch.