
Last updated November 17, 2026
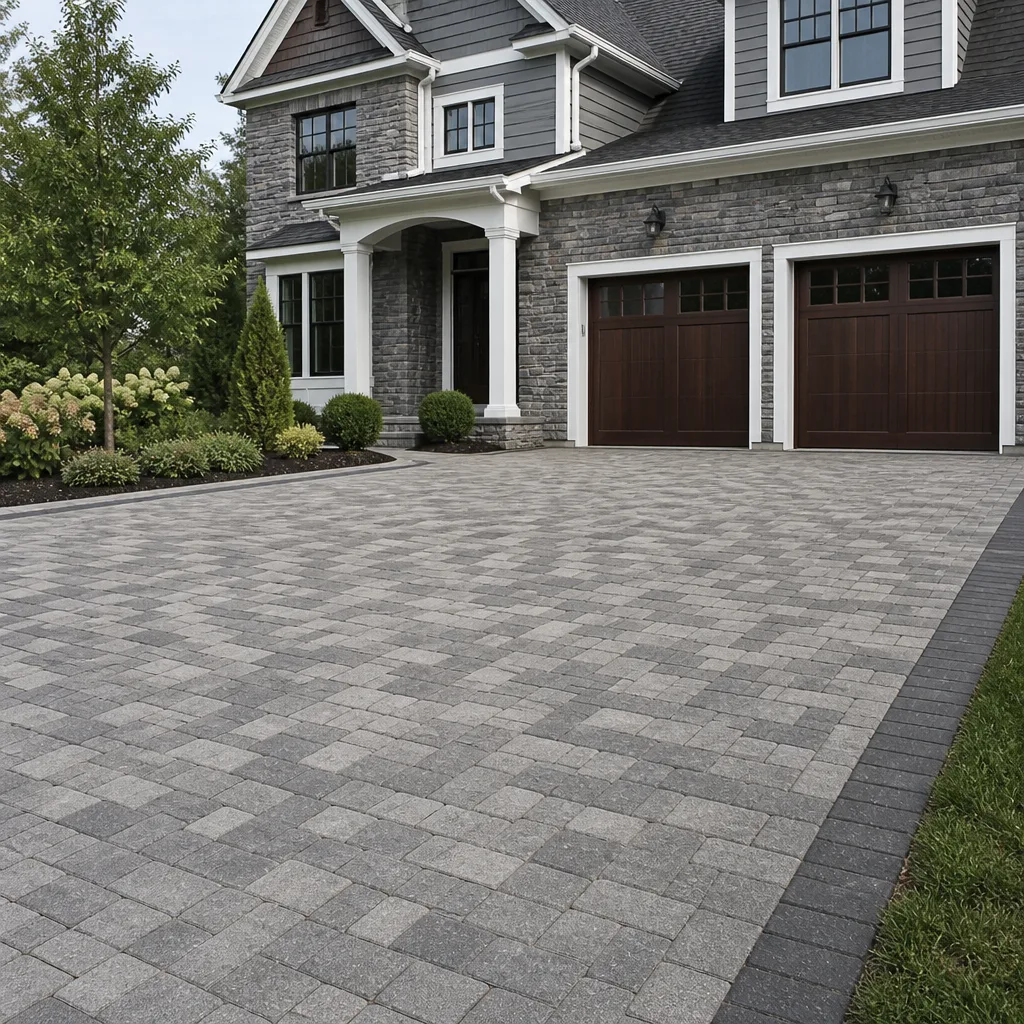 Driveway & pavers
 Kitchen remodeling
 Bathroom remodeling
 Home additions & ADU
 Roofing
 Windows & doors
 Fence
Free written scope consultation - allowances, timeline, and change-order rules on paper before a single trade is scheduled
DIY vs Professional Driveway & Pavers: What’s Safe to Do Yourself
You can absolutely lay pavers yourself. The part that sinks most DIY driveway projects isn’t the paver pattern or the cutting or the sand – it’s the base, which is the least glamorous work on the job and the only thing that determines whether the surface is still flat five winters from now. In Antioch, we see the results of skipped base work every spring: heaving, sunken tire tracks, pavers walking apart at the joints. Fixing a failed base typically costs more than hiring the whole job done correctly the first time. This guide draws the line for you: which tasks a careful homeowner can handle, which ones need equipment you can’t rent effectively, and how the real cost math works out.
Quick Answer
A skilled DIYer can safely handle paver layout, pattern setting, edge-piece cutting, and polymeric sand on a small pathway or accent area where a stable base already exists. Excavation to proper depth, sub-base compaction with plate and vibratory equipment, slope and drainage grading, and driveway-scale installations should go to a professional. For a full driveway in Antioch, professional installation usually costs less over ten years than a DIY attempt that fails at the base.
Styles & brands we work with
- Kitchen remodeling
- Bathroom remodeling
- Home additions & ADU
- Roofing
- Windows & doors
- Driveway & pavers
- Fence
Table of Contents
- Where the DIY Line Actually Is: The Base
- What a Skilled DIYer Can Safely Do
- Why Base Excavation and Compaction Need Real Equipment
- The Real Cost Math: DIY vs. Professional, Honestly
- Slope, Drainage, and Grading Liability in Antioch
- The One Situation Where DIY Is Clearly Right
- Antioch Soil, Climate, and What They Do to Pavers
- Choosing Materials: What the Pros Actually Install
Where the DIY Line Actually Is: The Base
Most conversations about DIY pavers start with cost and end with a paver layout photo. That framing misses the point. The base is where the decision gets made, and it happens before a single paver comes off the pallet.
A proper driveway base in Antioch involves excavating 6 to 10 inches below finished grade, depending on soil and traffic load, then building up compacted layers of Class II aggregate base. Each layer gets watered and compacted, and the whole assembly gets checked for slope and flatness before the bedding sand goes down. On Antioch’s expansive clay soils, the excavation often goes deeper and the compaction gets more attention, because clay that holds moisture can move a poorly built base within a single rainy season.
Here’s what that means for a homeowner with a rented plate compactor and a Saturday:
- Depth control requires digging with a consistent grade reference, usually laser or stringline, not eyeballing against the existing slab.
- Compaction testing isn’t something you can rent at the tool counter. You need a vibratory plate for the aggregate, and on driveway loads a walk-behind roller for the deeper lifts. A jumping jack compactor rented for one weekend will not achieve the same density as proper equipment run in the right passes.
- Slope and drainage need to be set before the base is compacted, not corrected after. Getting it wrong means tearing out the base to fix it.
When we install pavers in Antioch, the base work takes longer than the paver setting. The pattern goes down fast once the sub-grade is right. Ask any installer what the hard part is and you’ll hear the same answer.
What a Skilled DIYer Can Safely Do
Not every paver task is off-limits. If you’re handy, patient, and working on a small area, several jobs are within reach:
- Pattern layout. Setting pavers in a running bond, herringbone, or basket weave on a prepared bed is a repetitive task any careful person can learn. The pattern is determined by the material and the space, not by skill level.
- Cutting edge pieces. A wet saw or angle grinder with a diamond blade handles most cuts. Edge pieces at the perimeter and around curves take time, but they’re within reach of a homeowner with the right tool and safety glasses.
- Screeding bedding sand. Once the base is compacted and set, screeding 1 inch of bedding sand with a screed rail and straight edge is a learned skill, not a trade secret.
- Applying polymeric sand. Sweeping Quikrete polymeric sand into the joints, misting it, and letting it cure is a straightforward task. The trick is following the cure instructions and not walking on it too early.
- Edge restraint installation. Spike-down edge restraint along the perimeter is simple work, though the stakes need to be driven into solid material, not loose soil.
The pattern is the visible work and the work most homeowners picture when they think about DIY pavers. It’s also the fastest part of the job. What takes the time is underneath.
Why Base Excavation and Compaction Need Real Equipment
Excavation sounds like shovel work. On a small patio it often is. On a driveway, it isn’t.
A driveway in Antioch might run 500 to 800 square feet. At 8 inches of excavation depth, that’s roughly 12 to 20 cubic yards of soil to remove, most of it heavy clay following winter rains. That’s several dumpsters or a rented dump trailer and multiple trips to a disposal site, plus the physical work of moving material. Homeowners who try to excavate a full driveway by hand usually stall out halfway through, then backfill too shallow because the volume of removed dirt became a problem.
The compaction side is where equipment really matters. A vibratory plate compactor rented for a weekend runs at a certain frequency and force. Aggregate base needs to be placed in lifts of 2 to 4 inches, watered to near-optimum moisture, and compacted with multiple passes. A walk-behind roller for driveway loading gets density a plate alone can’t reach on deeper lifts. The density matters because the base is what transfers driveway loads, including cars, delivery trucks, and the occasional RV, into the soil. A poorly compacted base settles unpredictably, and once the surface pavers are locked in with polymeric sand, you can’t recompact without full tear-out.
Then there’s the labor. Two people using a plate compactor on a full driveway base will spend most of a long day on compaction alone, and the learning curve on equipment means the first few passes are usually inconsistent. Proper compaction takes skill and equipment most homeowners can rent but can’t run with the same result, because the tool rental comes with the tool, not the operator experience.
Our technicians have up to 12 years of experience on installations across the region, and base work is where that experience shows.
The Real Cost Math: DIY vs. Professional, Honestly
Here’s where the honest comparison lives, because most DIY-versus-pro cost articles stack the math one direction or the other. We’ll show both sides.
A DIY driveway project in Antioch involves these line items:
- Pavers at box-store or distributor pricing: a 500-square-foot driveway using Cambridge Pavers or Techo-Bloc typically runs $2.50 to $5.00 per square foot in material, so $1,250 to $2,500 in paver cost alone.
- Class II aggregate base: roughly 8 to 12 cubic yards for a driveway at 6 to 8 inches, at $35 to $55 per yard delivered, so $280 to $660.
- Bedding sand and polymeric sand: $200 to $500 depending on area.
- Edge restraint and spikes: $100 to $250.
- Equipment rental: plate compactor for two weekends, wet saw, dump trailer or dumpster for spoil, roughly $400 to $900 total.
- Disposal of excavated clay: Antioch clay is heavy and disposal fees run $50 to $80 per yard at local transfer stations, so another $300 to $500 for a full driveway.
- Your own labor: 40 to 80 hours for a first-time installation.
Total DIY material and equipment cost for a 500-square-foot driveway: roughly $2,500 to $5,300 in hard dollars, plus a month of weekends.
Professional installation for the same driveway runs somewhere between $8,000 and $14,000 in Antioch depending on material, access, and base depth, which is a number you can verify by calling for a free estimate. That’s higher on paper. What the professional number includes is the base done to depth, compaction that will hold up under clay soil, proper slope and drainage, and a written guarantee. A failed DIY base that needs full tear-out and rebuild in year three costs $6,000 to $10,000 on top of the original DIY spend, because you pay twice for materials and pay a second time for disposal.
What the honest math shows: for a small pathway, DIY wins on cost. For a driveway where failure means tear-out, the professional number is usually the cheaper number over any ten-year window. Call (888) 419-3650 for a line-item written quote on your specific driveway.
Slope, Drainage, and Grading Liability in Antioch
Slope isn’t a detail. It’s a permit and liability question on any paving project that touches the grading of a lot.
In Antioch, most residential paver installations don’t require a separate grading permit when they’re replacing existing hardscape at the same elevation. But when a new driveway or paver area changes drainage patterns, directs water toward a neighbor’s property, or raises the finished grade above surrounding soil, the project can fall under Contra Costa County or City of Antioch grading and drainage requirements. A driveway that slopes toward the house pulls water under the slab and into the foundation. A driveway that slopes toward the property line creates a nuisance drainage claim.
Here’s what goes wrong on DIY installations:
- The slope is set by eye, usually at 1/8 inch per foot when 2% is needed, so water pools at the garage door.
- The finish grade is raised to meet the adjacent sidewalk, but the soil around the new pavers is left low, so runoff drains under the pavers.
- The slope is graded correctly but nobody considered existing drainage from uphill neighbors, and the new driveway becomes a runoff channel.
When we install in Antioch, we check existing drainage pattern, soil type, and site grade before excavation begins. Getting the slope right is the part most DIY installations skip, and it’s the part that shows up as a problem two winters later.
If you want to see how this looks done right on a completed installation, our Driveway & Pavers in Antioch service page walks through the process from base to finish. And if the project involves a full site plan alongside the driveway, our Home Additions & ADU in Antioch page covers how site work is sequenced.
The One Situation Where DIY Is Clearly Right
There’s a clear case where DIY pavers make sense, and it’s narrower than most YouTube tutorials suggest: a small pathway, entry accent, or garden border where an existing stable base is already in place.
What “existing stable base” means: compacted aggregate or a concrete slab that’s been holding flat for years, no visible cracking or settling, and no drainage problem in that spot. On top of that base, a homeowner can install a 4-inch-deep paver border, pathway, or landing with minimal excavation (usually just removing existing finish surface) using 1 inch of bedding sand, edge restraint, and polymeric sand.
A path from the driveway to the front door. A small paver accent at the base of a step. A landing at a side gate. A garden pathway between beds. These are stable-base installations that look great, don’t need compacted sub-base depth, and can be finished in a weekend with rented tools and a wet saw.
What’s not the right DIY call: a full driveway, a paver patio over soil, a pool surround, or any installation where excavation to proper depth is required. Those are base projects, and base projects are what separates a paver surface that lasts 25 years from one that fails in three.
Antioch Soil, Climate, and What They Do to Pavers
Antioch sits on some of the more active clay soils in the East Bay, and the climate is a two-season challenge for any paving install. Getting this right matters more here than it does in drier or sandier parts of the country.
Antioch’s expansive clay swells and shrinks with moisture. During heavy winter rains, the clay under a poorly built base can move enough to lift pavers and crack the polymeric sand joints. During the dry season, the same clay shrinks, and if the base wasn’t compacted to proper density, the surface settles into the voids. In neighborhoods like historic downtown Antioch near the river, the water table gets closer to the surface during wet years, which is why excavation depth on those lots often needs to be deeper to reach stable sub-grade.
Heat is the other factor. Summer temperatures in Antioch regularly hit the upper 90s and low 100s, which expands pavers on a hot afternoon and drives thermal movement through the joints. Proper edge restraint matters more here than where summers are milder, because a poorly restrained edge lets pavers walk in the heat.
What this means in practice: for a driveway in Antioch, a 6-inch base is the minimum, and 8 to 10 inches is common on clay lots or in neighborhoods with heavier traffic. Compaction needs to be done in lifts, with moisture control. The polymeric sand needs to be a quality product that can handle thermal movement, and joint widths need to be consistent so the sand locks in place.
Our experienced technicians have seen the patterns across local installations, and the approach to base work in Antioch is not the same as it would be in a sandier or cooler market. When we install pavers, the base depth and compaction schedule match the specific lot.
Choosing Materials: What the Pros Actually Install
The material decision comes after the base decision, and it’s the part a homeowner can most easily research and compare without a contractor in the mix.
What the professionals install in Antioch, generally:
- Techo-Bloc and Cambridge Pavers for driveways and heavy-load surfaces, both of which are engineered for continuous vehicle traffic and have a strong track record under East Bay conditions.
- Oldcastle and similar large-format producers for patios and pathway applications where the load is lighter.
- Quikrete polymeric sand for joints, matched to joint width and paver type, because a sand too coarse or too fine can fail within a season.
- Class II aggregate base for sub-grade, with compaction in 2- to 4-inch lifts.
Homeowners choosing their own material should look at the manufacturer’s traffic rating (light vehicles only vs. full driveways), the frost and thermal movement rating, and whether the surface finish is slip-resistant when wet. Cambridge Pavers and Techo-Bloc both publish clear spec sheets, and a phone call to the distributor confirms availability before the project starts.
Material choice affects long-term cost as much as any other decision. A $3.00-per-square-foot paver that fails its facing after one winter costs more than a $4.50-per-square-foot paver that holds up. For a driveway, go with a grade tested for vehicle load. No exceptions.
Groundwork Construction Co. of Antioch partners with a curated list of material brands across every category, including Belgard for hardscape, and we can quote Cambridge Pavers or Techo-Bloc side by side so the cost and durability comparison is in writing before you decide.
Common Mistakes to Avoid
- Backfilling too shallow. Homeowners trying to escape the cost of disposing excavated clay often use less base depth than the project needs. It saves money in the short term and guarantees the surface settles within a year.
- Using a plate compactor only, no roller. A plate compactor works for small paths. On a driveway, the base needs a walk-behind roller for the deeper lifts. A rented plate alone won’t get the density, especially on clay.
- Setting slope by eye. Water pooling at the garage door after the first Antioch rain is a classic DIY error. Slope should be 2% away from structures, checked with a level and stringline, not with the naked eye.
- Installing over existing soil without excavation. Adding pavers on top of loose dirt or old gravel that hasn’t been compacted is the most common failure we see when we’re called to fix a DIY installation in Antioch.
- Mixing polymeric sand at the wrong moisture level. Polymeric sand needs to be misted, not soaked. Overwatering after application softens the joint, and it fails over the first winter.
- Skipping edge restraint. On a 100-degree afternoon in Antioch, pavers without edge restraint move outward. If the edge isn’t spiked in, the whole surface will shift within two seasons.
- Not accounting for drainage from uphill. If a neighboring lot or a hillside drains onto the driveway location, the new pavers need the water managed before installation, not after. Check upstream drainage, not just the immediate site.
See the difference
 Before
 After
 Before
 After
 Before
 After
When to Call a Professional
Call for a professional paver installation when the project is a full driveway, a patio over soil, a pool surround, a paver installation requiring excavation, or any paver area where the base needs to be built from sub-grade. Call when a previous DIY installation has settled or heaved. Call when the site has drainage issues from uphill properties or when the slab elevation will change. Call when the paver surface will support regular vehicle traffic, an RV, or a heavy truck. Call when you want a written guarantee covering workmanship rather than a handshake. Groundwork Construction Co. of Antioch offers free estimates across Antioch and the surrounding East Bay – call (888) 419-3650 to schedule one. Our estimates are line-item and in writing, with 0% financing for 18 months available and $1,000 off projects over $10,000. Every paver project is covered by the 730-Day Done Right Promise, and our team is background-checked.
Frequently Asked Questions
Professional paver driveway installation in Antioch typically runs $8,000 to $14,000 for a 400 to 600 square foot driveway, with material, base depth, and site access driving the range. Material accounts for $1,250 to $3,000 of that, and the rest is base work, labor, and disposal. Call (888) 419-3650 for a written line-item estimate on your specific lot – estimates are free.
You can lay the pavers, but the base is the limiting factor. A full driveway in Antioch requires excavation of 6 to 10 inches, compaction of Class II base in multiple lifts, slope and drainage grading, and disposal of several tons of excavated clay. Most homeowners can’t match the compaction density with rented equipment. We recommend DIY for small accent or pathway areas with an existing stable base, and professional installation for driveway projects.
Yes. The pavers are only as good as the base below them. Settling, heaving, and joint failure often show up 12 to 24 months after installation, long after the surface looked finished. When we’re called in to inspect a failed installation in Antioch, the problem is almost always the base depth or compaction, not the pavers themselves.
Most paver installs that replace an existing driveway at the same elevation don’t require a separate permit in Antioch, but any project that changes drainage patterns, alters grading, or raises finish grade above surrounding soil can fall under City of Antioch or Contra Costa County grading and drainage rules. We work through permit requirements during the estimate so you know before work begins.
A paver driveway installed with a properly compacted 6- to 8-inch base typically lasts 25 to 30 years or more in Antioch, even with East Bay clay and heat cycles. A driveway installed over an under-compacted or shallow base can fail in three to five years. Base depth and compaction are the biggest variables, not the pavers.
Polymeric sand hardens when misted with water and locks pavers in place while resisting weeds and rain washout. Regular joint sand stays loose and washes out over time. In Antioch, where dry summers and wet winters create thermal movement, polymeric sand (including Quikrete products) holds joints steady and stays in place through both seasons. We use polymeric sand on every joint in a driveway install.
The Bottom Line
The DIY-versus-pro driveway question isn’t really about the cost of labor. It’s about the base, which is the invisible part and the only part that determines whether the surface lasts. DIY works well for small accent and pathway areas on an existing stable base. For a full driveway in Antioch, the base work needs proper excavation depth, real compaction equipment, and grade-and-drainage judgment that most homeowners can’t rent at the tool counter. Honest cost math on a failed DIY installation usually lands above the professional quote. If you’re weighing your own driveway project, call (888) 419-3650 for a free written estimate and walk through the base requirements for your lot. No-hassle upfront pricing, the number you see is the number you pay, and every install is backed by the 730-Day Done Right Promise.
Whether you’re comparing pavers to concrete or planning site work alongside a garage or fence project, our team can help coordinate the layers: visit the Groundwork Construction Co. of Antioch home page, our Fence Installation in Antioch service page, and the rest of our service pages for the full picture. From foundation to finish line – built to last, backed in writing. Call (888) 419-3650 to schedule your free estimate.
Written by the team at Groundwork Construction Co. of Antioch.