
Last updated November 17, 2026
 Bathroom remodeling
 Kitchen remodeling
 Home additions & ADU
 Roofing
 Windows & doors
 Driveway & pavers
 Fence
Free written scope consultation - allowances, timeline, and change-order rules on paper before a single trade is scheduled
Bathroom Remodeling Troubleshooting: Common Problems and How to Fix Them
Tile that looks perfect can be sitting on a waterproofing membrane that was never properly cured or lapped, and you won’t know until the subfloor is rotting beneath it, typically 18 to 36 months after the job was “completed.” That gap between how a bathroom looks and how it performs is where most remodel problems hide. We’ve walked into Antioch homes where the shower looked showroom-ready but the drywall behind it was soft as cardboard. This guide breaks down the real failures, how to diagnose each one, and why the fix depends entirely on whether you’re looking at a tile problem, a waterproofing problem, or a substrate problem.
Quick Answer
Most bathroom remodel problems fall into three buckets: tile and grout failures at the surface, waterproofing failures behind the tile, and plumbing or ventilation problems in the walls and ceiling. The surface fix is usually straightforward and cheap. The other two mean opening things up, which is why diagnosing correctly before you call anyone saves you thousands. In Antioch’s hot, dry summers and cool, wet winters, moisture movement inside a bathroom accelerates these failures, so the diagnosis matters even more.
Styles & brands we work with
- Kitchen remodeling
- Bathroom remodeling
- Home additions & ADU
- Roofing
- Windows & doors
- Driveway & pavers
- Fence
Table of Contents
- How to Diagnose a Bathroom Remodel Problem
- Grout and Caulk Troubleshooting Matrix
- Waterproofing Failures: The Hidden Damage
- Plumbing Problems That Start During Remodels
- Exhaust Fan Failures and Downstream Damage
- Substrate and Structure Failures
- How to Document and Present a Problem
- Warranty, Recourse, and Done Right Guarantees
How to Diagnose a Bathroom Remodel Problem
The most expensive mistake in bathroom remodeling troubleshooting is misreading symptoms. A crack in the grout doesn’t automatically mean the tile job was bad. A soft spot on the floor near the shower doesn’t automatically mean the shower pan failed. You have to trace the symptom to the layer where the failure actually lives. In our experience, roughly half the bathrooms we tear apart get diagnosed wrong by the homeowner first, and that misdiagnosis leads to a repair that treats the wrong layer and fails again within a year.
Start with where the moisture sits and when it appears. A stain that grows after showering points to a membrane or seal failure. A stain that grows during every rainfall points to roof or exterior wall intrusion, not the bathroom itself. A slow drain that backs up every Tuesday points to a venting problem, not the drain fixture. A musty smell with no visible moisture points to the exhaust system or a concealment cavity. Each of these sends you down a completely different repair path.
Here’s the simple three-layer test we use on Antioch remodels:
- Surface layer (tile and grout): Tap tiles with a plastic screwdriver handle. A hollow sound means the tile has debonded from the thinset. Look at grout lines for hairline cracks that follow the tile edge, not just at corners.
- Waterproofing layer (membrane or board): Check for efflorescence (white powdery residue) on grout, uneven color on adjacent drywall, and a musty smell that doesn’t clear after ventilating. These mean moisture is sitting behind the tile.
- Substrate (cement board, drywall, subfloor): Press down on the floor around the shower and tub. If it flexes, feels squishy, or sounds dead when tapped, the substrate is compromised. At that point the repair is not cosmetic.
Antioch’s dry summer heat can also mask a waterproofing failure for months because the cavity dries out fast between uses. A homeowner in Natomas or here in Antioch can go all summer thinking the shower is fine, then see a stain bloom in November when the rains come and the vents cycle more humid air. That’s why we always recommend checking moisture-meter readings in the concealed space, not just what you can see at the tile. Once you know which layer is failing, the next sections cover what to do for each one.
Grout and Caulk Troubleshooting Matrix
Grout and caulk are your early warning system, but each symptom points to a different cause. Learning to read them takes ten minutes and tells you whether you’re looking at a cosmetic touch-up or a failing waterproofing system. The colour, the pattern, and the timing of the failure all matter. Here’s the matrix we use when evaluating bathroom remodels around Antioch.
- Hairline cracks along the grout line: Almost always normal shrinkage over time, especially on new work in the first year. If they follow inside corners only, they may just need proper caulk instead of grout at the change-of-plane joints.
- Grout that turns dark or green-stained in patches: Moisture is wicking up from below. The stain usually follows the grout joint closest to the wet location, which points to a membrane or pan failure, not the grout itself.
- Grout that softens into a paste when wet: The mix was wrong or the grout cured too wet. This can happen in Antioch’s dry climate if the tile was set outdoors on a hot day or during a summer remodel where the grout was mixed too loose. Soft grout means re-grout at minimum.
- Caulk that peels away at the tub or shower base: Almost always movement between the tub and the floor, or the wrong caulk product (silicone vs. latex). Re-caulking with the right product fixes it, but if water has already been getting behind, the fix is bigger.
- Caulk that stays tacky or never fully cures: Cured too fast, mixed with the wrong product, or applied over a wet surface. This is the most common cause of a “leaking” shower that’s actually just water sheeting through a bad caulk joint.
The timing tells you the story. Cracks appearing in the first six months are almost always installation or material issues solved by the installer under warranty. Cracks that appear after two years are usually movement issues related to the structure of the house, or a waterproofing problem that’s been making the substrate move as it swells and dries. We’ve seen this in older Antioch homes where a bath remodel was done without proper deflection checks, and the whole floor flexes enough to crack every grout line within three years. If your cracks are crowding the same area, the fix is under the tile, not at the surface.
Waterproofing Failures: The Hidden Damage
Waterproofing is the single most skipped or rushed step in a bathroom remodel, and it’s the one that causes the most expensive damage. A properly installed system has a membrane that laps at least two inches at every seam, is fully cured before the tile goes on, and continues up the walls at least six inches above the shower pan in a standard shower. When that step is skipped, the failure doesn’t show up until the water has already done months of damage behind the wall. That’s typically 18 to 36 months after the remodel, and by then the visible tile may still look perfect.
Here in Antioch, we see a specific pattern: showers that were originally framed as alcoves and converted to walk-in designs during the remodel, where the waterproofing wasn’t extended far enough past the original framing. The East Bay’s warm, dry summers keep the wall cavity dry enough to hide the problem until the wet season hits, which is why so many of these failures show up in November or December, and again in the spring. Once the soil outside the foundation gets saturated and the ambient humidity rises, the interior drywall starts to smell, peel, or soften, and the homeowner suddenly realizes the shower has been quietly feeding the wall for two years.
The diagnostic signs of a waterproofing failure are consistent, and worth listing because they’re so often confused with other problems:
- Efflorescence on grout or tile, especially white powdery streaks near the bottom of the shower
- A musty smell in the bathroom that gets stronger on humid days and doesn’t clear after the fan runs
- Loose tiles in the lower half of the shower, which often debond first because they’re closest to the water source
- Soft spots or “give” in the drywall on the opposite side of a shared shower wall
- Paint bubbling or peeling on the ceiling below the bathroom
The fix is not to seal the tile and call it done. That only traps the moisture and accelerates the decay. The right repair gets down to the substrate, replaces any compromised cement board or drywall, installs a proper waterproofing membrane with the correct lap seams and corner reinforcement, and re-tiles. If you’ve been through this once already, the biggest lesson is to insist on a written waterproofing spec before the next contractor starts. A shower that was properly waterproofed, properly cured, and properly inspected really does last decades. A shower that skipped that step is on a clock, and the clock is already running.
For homeowners considering a full tear-out rather than a targeted repair, our Groundwork Construction Co. of Antioch home page covers the full scope we handle across the region, from sheetrock and substrate replacement to finish carpentry.
Plumbing Problems That Start During Remodels
Slow drains and intermittent leaks are the two most common plumbing complaints we get after a bathroom remodel, and both usually trace back to installation mistakes, not fixtures wearing out. A shower drain that slowly backs up within months of a remodel is almost always a venting problem or a trap that was installed too shallow. A pinhole leak inside a wall is almost always a connection that wasn’t properly tested before the wall closed. Neither one is a fixture failure, and neither is fixed by replacing the drain or the faucet.
The trap issue is more common than most homeowners realize. A shower pan drain needs a P-trap of sufficient depth, and it has to be independently vented or tied into a properly sized vent line. When a remodel moves a shower or installs a new walk-in pan, the plumbing has to be rerouted, and if that reroute skips the vent or shares a trap with a sink drain, the drain gurgles and empties slowly. It looks like a clog. It isn’t. Snaking the drain won’t help. The fix means opening the wall or floor to install a proper vent line, and it’s a good example of why untested plumbing connections are the other big risk.
For the intermittent leak, the diagnostic is pressure testing before the tile goes on. We hold the system pressurized for at least 30 to 60 minutes, checking every joint and supply line while the wall is still open. When a connection isn’t tested and the wall goes up, the first sign of trouble is usually a stain on the ceiling below the bathroom or a water spot on the hallway drywall. Both mean the wall has to come open again, which doubles the repair cost and cancels out any savings from skipping the test.
The most common plumbing problems we correct after a remodel in Antioch are:
- An improperly sized P-trap on a relocated shower or tub that can’t handle the drain volume, causing slow drain and occasional backup
- Missing or shared vent lines that cause gurgling and trap siphonage, often where a remodel consolidated two fixtures into one
- No pressure test before wall closure on supply lines, which leaves a small leak undetected until it damages the wall cavity
- Wrong supply line material mismatched at a new fixture, which fails from corrosion within a few years, especially in areas with harder water
- Shower valve rough-in off-center or too shallow, which causes leaks at the trim plate or a valve you can’t fully shut off
We always tell customers in Antioch: if the plumbing is being touched, insist on a documented pressure test and a photo of every joint before the wall closes. It’s the single cheapest insurance against the most expensive repair. When we handle a bathroom remodel, our technicians have up to 12 years of experience, and the pressure test is a fixed part of the process, not an optional add-on.
Exhaust Fan Failures and Downstream Damage
Bathroom exhaust fans fail quietly, and their failure shows up somewhere else in the house long before the fan itself breaks. When a fan can’t move enough air, moisture builds up in the bathroom, migrates into the drywall and framing, and produces peeling paint, soft drywall, and eventually mold in the corners and ceiling. The homeowner usually finds it by noticing the paint peeling above the shower or a stain forming on the ceiling near the fan grille. By then the fan has been underperforming for a year or more.
The first diagnostic step is checking whether the fan was ever the right size for the bathroom. The general rule for residential bathrooms is that the fan should exchange the room’s air volume at least eight times per hour, which works out to about 1 CFM per square foot of bathroom floor area for a standard ceiling height. A 5-foot by 8-foot bathroom needs at least 40 to 50 CFM. A 10-foot by 10-foot bathroom needs 100 CFM or more. Many of the fans installed during smaller remodels are 50 CFM units that were sized for a half bath and never upgraded when the room got bigger. That’s a silent failure mode.
The second check is ducting. A fan that’s properly sized but ducted through a long, flexible run (more than 10 to 15 feet) with several elbows loses most of its capacity before the air ever exits the roof. We’ve pulled fans in Antioch homes that were rated at 110 CFM and moving closer to 30 because the flex duct had collapsed or been kinked during a roof or attic remodel. The fan looked fine. The air never left the room.
Here’s a quick diagnostic sequence for a suspect fan:
- Tissue test: Hold a single tissue against the grille while the fan runs. If it doesn’t suck flat against the grille, the fan is weak, blocked, or undersized.
- Check CFM rating: Look for the fan’s rating on the housing or in the installation manual. Compare it to bathroom square footage times one.
- Listen for the fan after it’s off: A rattling grille, or the fan whining for several seconds after shutoff, means a motor or bearing issue that should be replaced.
- Check the exterior vent: Walk the roof or exterior wall. If the vent flap doesn’t lift freely or the duct terminates in the attic instead of outside, the fan is doing nothing useful and the moisture is going into the attic.
The fix is almost always one of three things: upgrade to a properly sized fan, correct the ducting so it runs short and insulated to the exterior, or both. Mold that’s already formed on drywall needs treatment or replacement before the new fan goes in, so the exhaust fix and the moisture damage repair should happen together. Our Home Additions & ADU in Antioch work runs into this constantly, where a new bath addition is designed with an exhaust system that has to be checked against the local building code for exterior termination and sizing before the framing closes.
Substrate and Structure Failures
Substrate failure is the deepest and most expensive category, and the one where the wrong fix leads to a second failure. Substrate is what the tile and waterproofing sit on: cement backer board, drywall, or the subfloor below. When the substrate fails, the tile above it moves, the waterproofing layer stretches and cracks, and the whole shower system starts to come apart at once. The most common symptom is a floor that gives when you step near the shower or tub, or a wall behind the tile that sounds hollow when tapped with a knuckle or a plastic screwdriver handle.
We see substrate failure often in Antioch homes built during the 1970s and 1980s tract development waves, where original bathrooms were tiled over drywall rather than cement board, and a prior remodel just tiled over the existing surface without addressing the substrate. That second layer of tile is the one that shows the failure: the grout cracks first, then the tile starts popping, and by year three the whole floor near the shower has movement. The fix is a full tear-out to the framing, replacement of any compromised subfloor with proper cement board, correct deflection underlayment, and re-waterproofing before any tile goes back down. A patched repair on top of a failing substrate never holds.
The other substrate failure we run into is a poorly built shower pan, especially on remodeled walk-in showers. If the pre-slope wasn’t installed correctly or the liner was punctured during tile installation, the pan holds water like a cup. That water wicks into the subfloor, and the failure shows up as a soft, spongy floor near the shower drain, sometimes with a visible stain on the ceiling below after heavy use. When it’s caught early, the pan can be rebuilt without replacing the tile. When it’s been sitting for years, the entire pan and floor tile have to come out, and the framing below needs to be inspected for rot.
The good news is that substrate failures are the most predictable part of a remodel to prevent. Three steps stop almost all of them:
- Cement board, not drywall, on any wall inside the wet zone, fastened per the manufacturer’s spec and taped at seams
- Pre-slope under the shower liner so water always drains to the weep holes, and a liner installed without punctures or nails
- Deflection check on the floor joists before tile, so the floor doesn’t flex underfoot and crack the grout later
When we take on a bathroom remodel in Antioch, these three items are documented on the permit drawings and inspected before the tile goes on. If a contractor can’t show you a deflection calculation, a pre-slope spec, and a waterproofing detail, that’s the moment to slow down and ask questions.
How to Document and Present a Problem
How a homeowner presents a problem to a contractor determines how fast it gets resolved. Vague complaints like “the shower is leaking” turn into weeks of back-and-forth because the contractor can’t isolate the cause. A specific, photographed, dated report with moisture readings and a clear timeline gets a faster response, because it gives the contractor something concrete to work with. This is true whether the contractor is one we’re recommending or one you hired years ago.
We always recommend the same process to Antioch homeowners who call us about a problem from a previous remodel, and it applies to any contractor relationship:
- Photograph the symptom, not just the location. A photo of the stain on the ceiling below, a photo of the grout line with the joint open, a photo of the water-level line in the shower pan after a shower. Include a ruler or coin next to the stain for scale.
- Date every entry. Note when the symptom first appeared, when it worsened, when it’s better (dry weather) and worse (after rain or showering). A timeline is the most useful diagnostic tool the contractor can get.
- Take a moisture reading if you can. Even a basic pin-type moisture meter, under $50, gives you a number at the affected drywall or tile. If it reads above 20% in a dry-area wall, that’s a documented failure.
- Document everyone involved. Save the original contract, the change orders, the photos from the remodel, the warranty paperwork, and the names of every technician who touched the bathroom.
- Write a one-page summary. What the symptom is, when it started, what you’ve already tested, what you want the contractor to do (diagnose, repair, or both), and the date you’ll follow up.
Send that summary with the photos in one message, not three. Contractors deal with hundreds of emails, and a single organized message with attachments gets read and actioned. If the contractor doesn’t respond within five business days, send a follow-up referencing the first message and set a specific date for a return call. If there’s no response after that second attempt, you’re at the point where you should involve a third party: a licensed inspector if it’s a building code issue, or your state’s contractor licensing board if it’s a warranty issue. Both have documented complaint processes and both create a record that matters if you end up needing a legal opinion later.
Warranty, Recourse, and Done Right Guarantees
The best time to solve a bathroom remodel problem is before it happens, by hiring a contractor who backs the work in writing. A workmanship warranty is the difference between a contractor who treats a waterproofing failure as their cost and one who treats it as your cost, and the difference is measured in thousands of dollars. That’s why we put our 730-Day Done Right Promise in writing on every project: if it isn’t done right, we make it right, and that covers the two-year mark where most waterproofing and substrate failures first show.
When you’re evaluating a contractor after the fact, or considering one for a new bathroom remodel in Antioch, check three things on the warranty: what it covers (materials, labor, or both), how long it runs (two years is the current industry standard for meaningful workmanship coverage, and 730 days is one of the longest in residential construction), and how a claim is submitted (phone number, process, response time). A warranty with no process is a warranty that doesn’t exist.
If you’re already in a dispute with a previous contractor, your options run in this order:
- Written notice with photos and a timeline, sent within the warranty window, to the contractor’s documented address
- Contractor’s state licensing board complaint process, which creates a formal record and can trigger an investigation if the contractor is licensed
- Third-party inspection, from a licensed building inspector or a licensed contractor who will put the finding in writing
- Small claims court or arbitration, depending on what the original contract specified
The order matters. Most warranties require notice and an opportunity to correct before any legal step, so documenting the first message and the timeline is what makes every later step hold up. Call (888) 419-3650 if you want to talk through what we see in Antioch, even if your problem started with a different contractor. Our calls are answered by a live person around the clock, and we can usually tell you within a few questions whether you’re looking at a surface fix, a waterproofing repair, or a full rebuild.
Common Mistakes to Avoid
- Sealing the tile to “stop the leak.” Sealing over active moisture traps water against the substrate and accelerates the rot. Fix the source first, then seal.
- Re-caulking a wet joint. Caulk applied over trapped water never bonds and reopens within months. The joint has to be completely dry before it’s sealed, which in Antioch’s winter months can mean giving it a week of dry weather.
- Skipping the pressure test to save a day. Testing the plumbing before the wall closes costs an hour. Skipping it and finding a pinhole leak after the tile is up costs a full tear-out.
- Assuming a bigger fan is overkill. An undersized or kinked exhaust fan leaves moisture in the walls for years. The correct CFM for the room size and a short, insulated duct are not optional.
- Re-tiling over a failing substrate. A second layer of tile over a spongy floor or a compromised cement board doesn’t hold. The surface looks new for 18 to 24 months, then fails again from underneath.
- Accepting a verbal warranty. A workmanship promise that isn’t in writing with a defined claim process doesn’t survive a contractor’s change of staff, ownership, or phone number. Get it in the contract.
- Waiting a year to report the first symptom. The first stain, the first soft spot, and the first crack are the cheapest moments to fix. Water damage compounds, and the repair cost roughly doubles every six months it goes unaddressed.
See the difference
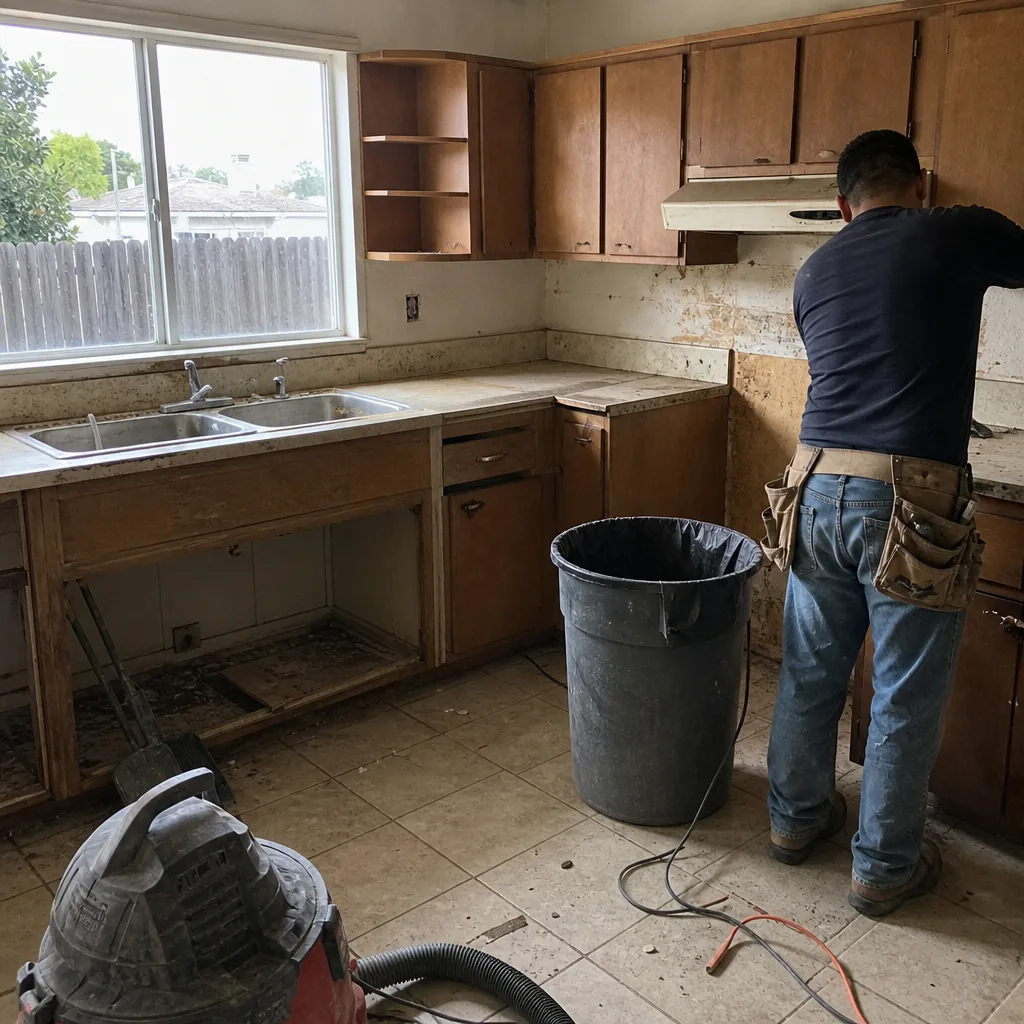 Before
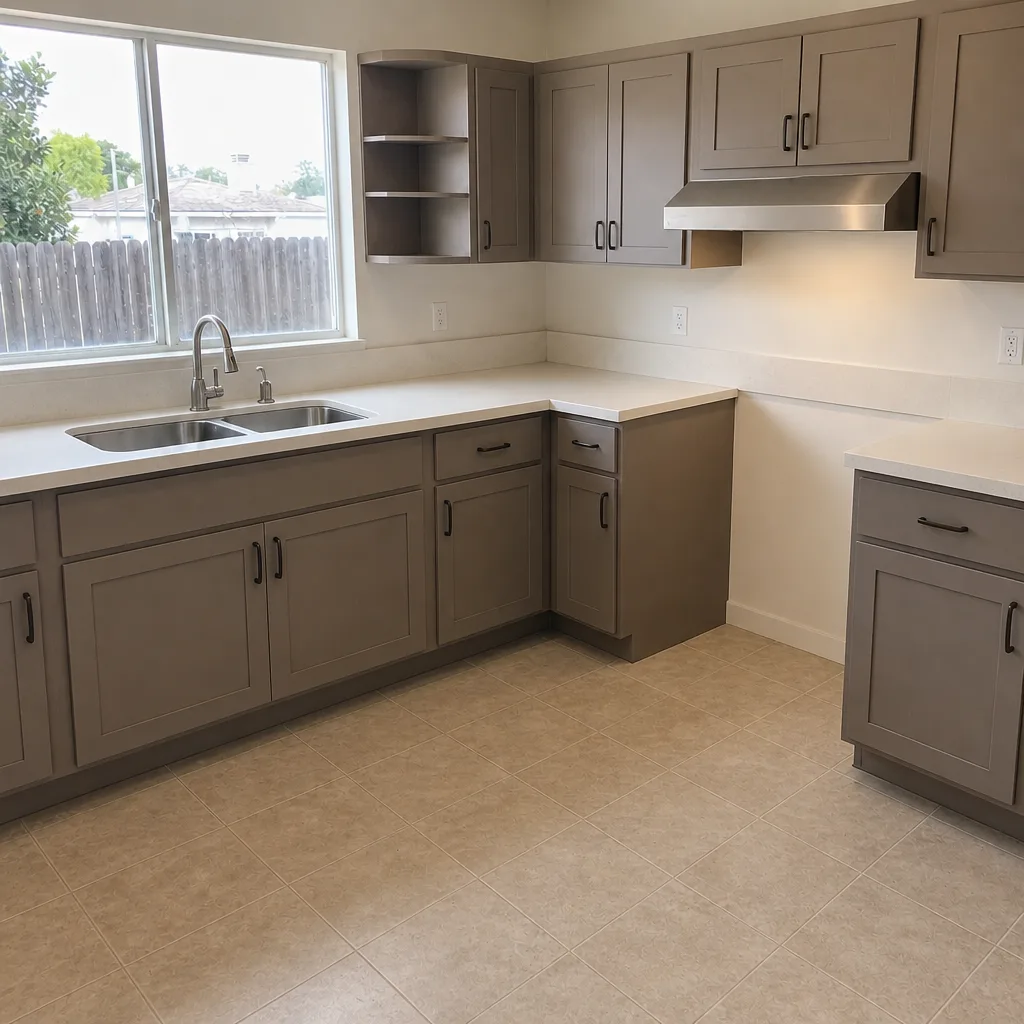 After
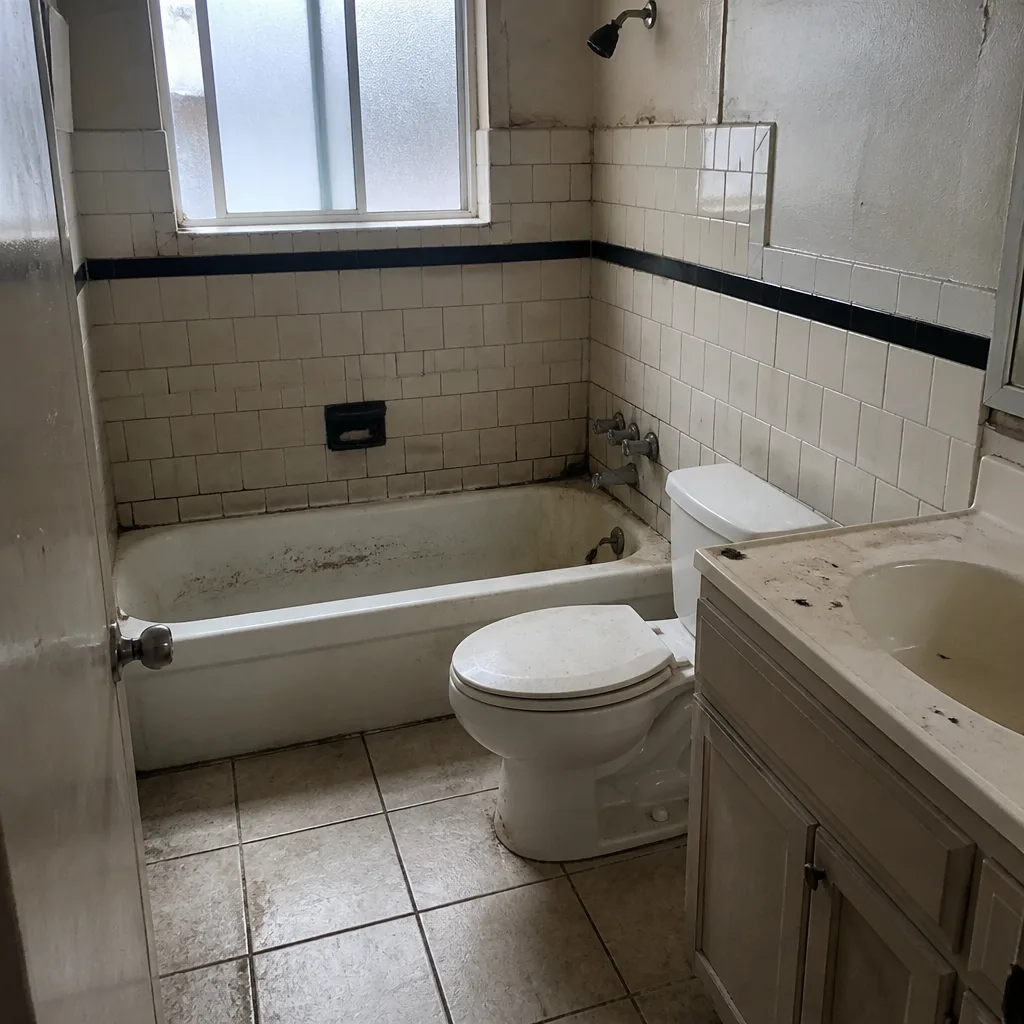 Before
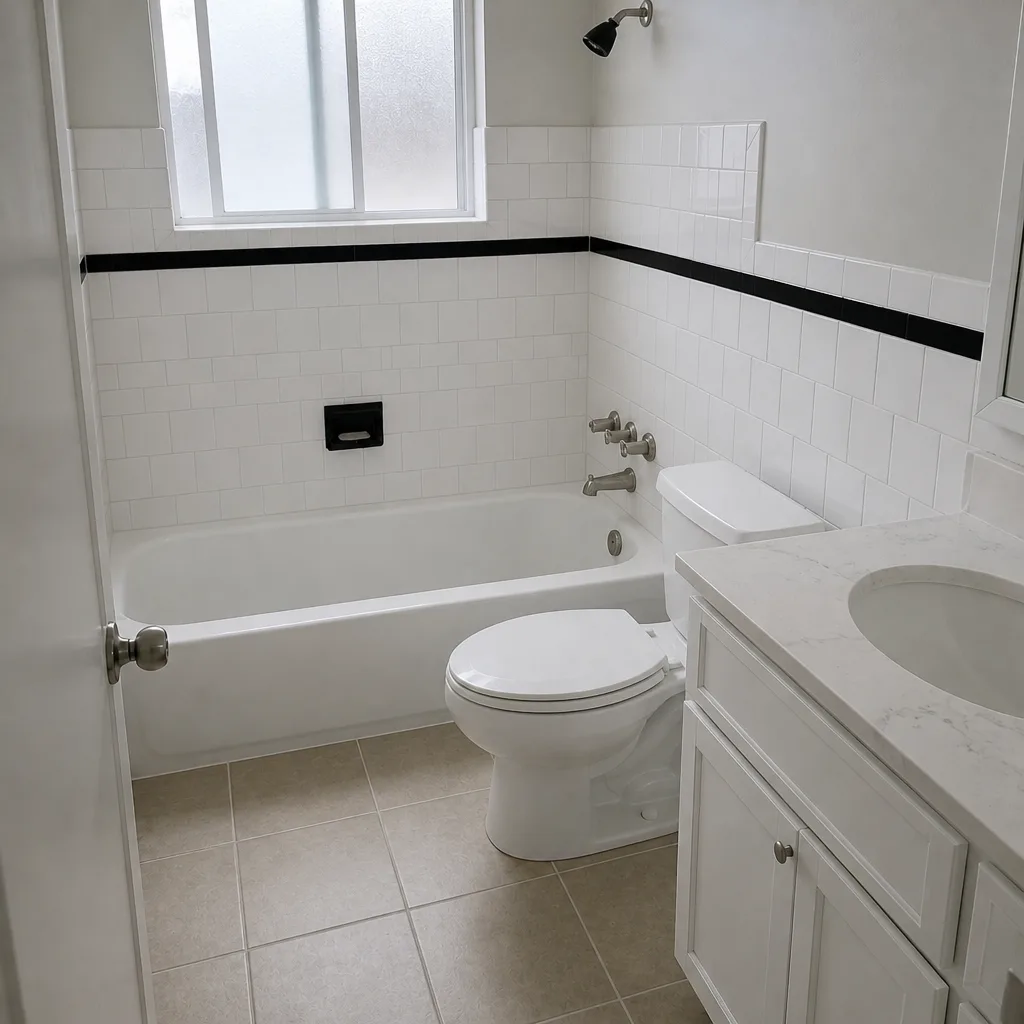 After
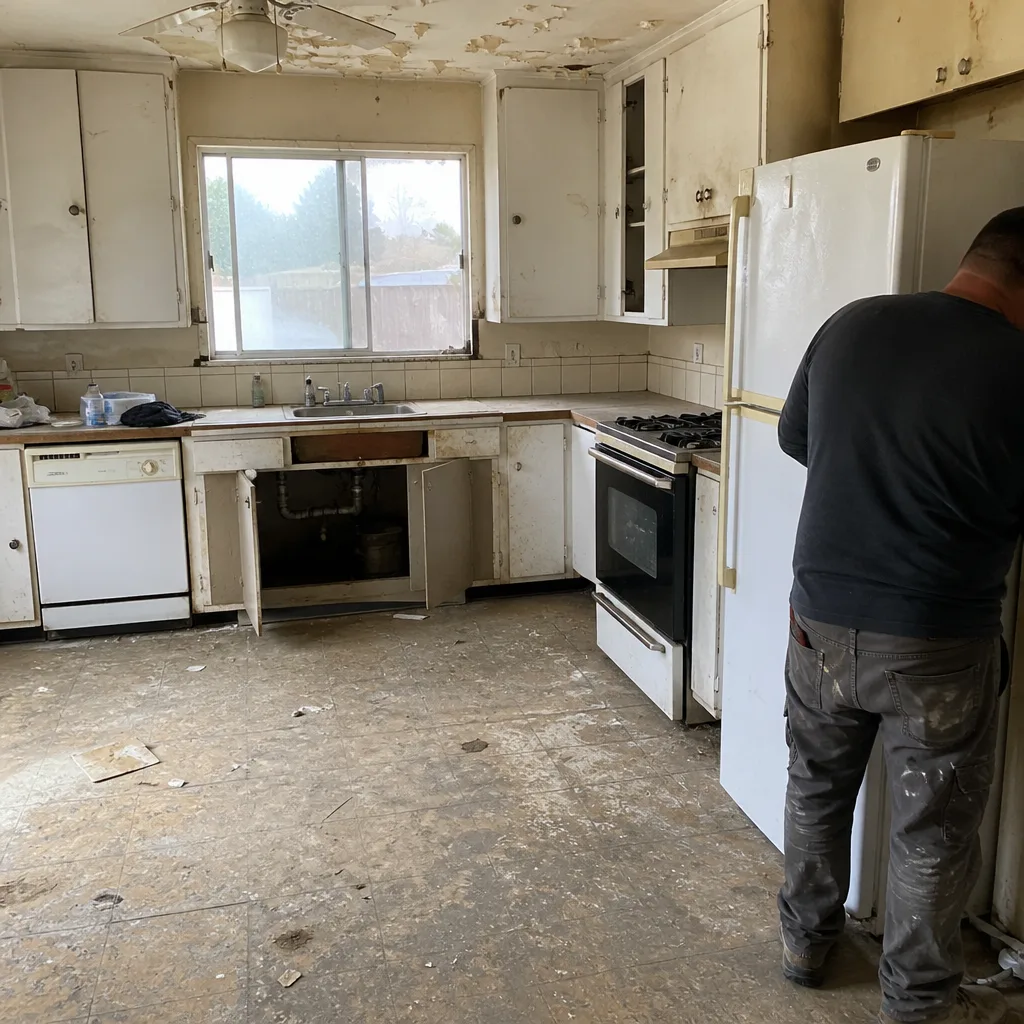 Before
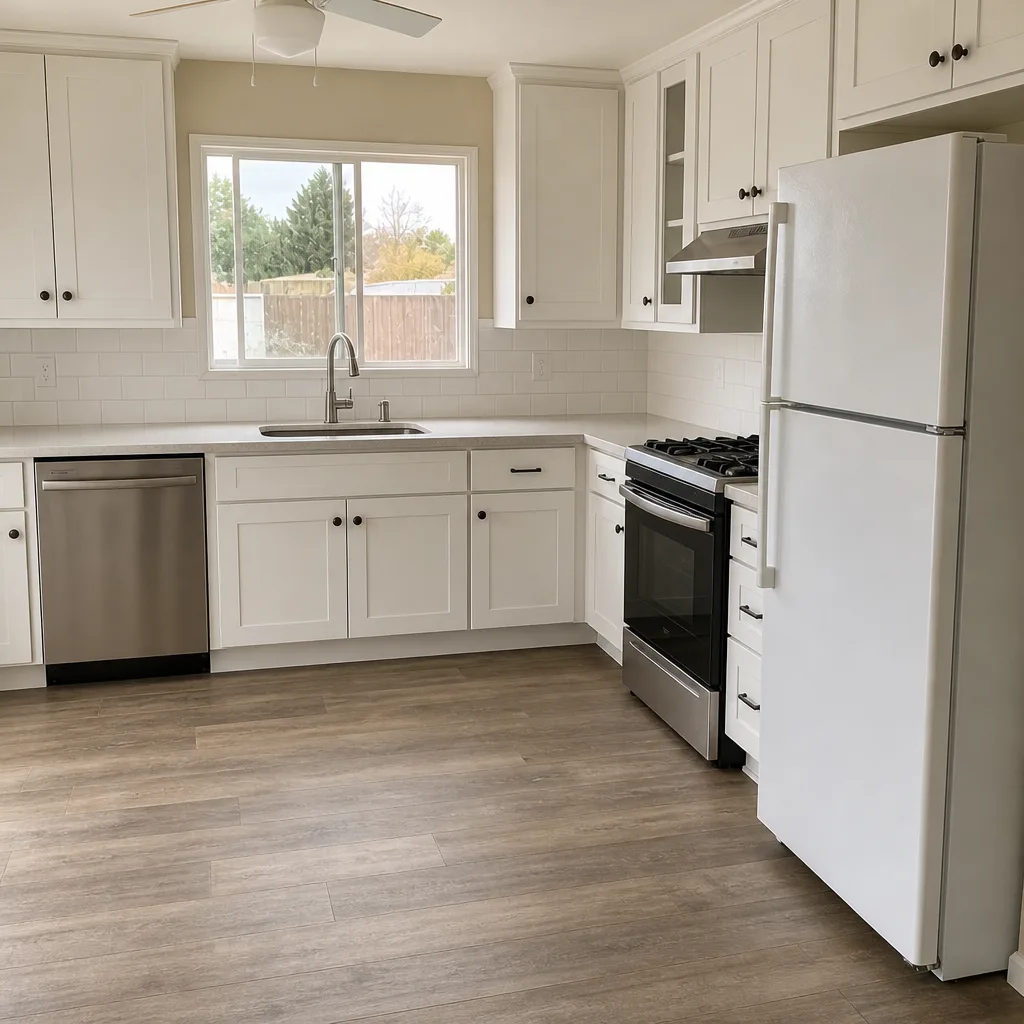 After
When to Call a Professional
Call a professional when the symptom is behind the wall or under the tile, when you’ve already re-caulked or re-grouted and the problem came back, or when you’re within 24 months of a remodel and the workmanship should be covered by warranty. If the shower pan is soft underfoot, the drywall below the bathroom is staining, or a plumbing leak appears in the ceiling, stop using the shower and get a licensed contractor out. Water damage gets more expensive by the month, and a minor issue on a Tuesday becomes a full rebuild by next spring. Groundwork Construction Co. of Antioch offers free estimates in Antioch, and our technicians have up to 12 years of experience diagnosing exactly this kind of failure. Call (888) 419-3650 for a free estimate; live people answer, day or night. For driveways, patios, and hardscape work that often accompanies a bathroom or exterior refresh, our Driveway & Pavers in Antioch page covers that scope too.
Frequently Asked Questions
Common repairs in Antioch typically break down into three ranges: a surface re-grout or re-caulk fix runs roughly $200 to $600, a targeted waterproofing or shower pan repair where the tile has to come up in one area runs $1,500 to $4,000, and a full shower rebuild with substrate replacement runs $6,000 to $14,000 depending on size and finish. The exact cost depends on how much of the tile, substrate, and plumbing has to open up. Call (888) 419-3650 for an exact quote, and estimates are free.
Tap the tile with a plastic screwdriver handle. A hollow sound and loose tiles in the lower portion of the shower point to a waterproofing or substrate problem, while tight tiles with hairline cracks only at the grout line point to a surface issue. The other tell is timing: cracks that return within 12 months of re-grouting mean the movement is coming from underneath. Call (888) 419-3650 and we can walk through the symptoms with you before you decide on a repair.
No, and sealing over an active leak is the most common mistake we see in Antioch. Grout sealer stops surface staining, not water coming from behind the tile. If the moisture source is a waterproofing or plumbing failure, sealing the surface traps water against the substrate and accelerates the damage. The fix is to locate the source, repair it, dry out the cavity, and then re-seal. Call (888) 419-3650 for a diagnosis.
In our experience, most exhaust fan failures in Antioch come from a fan that was undersized for the bathroom plus a flexible duct run that’s too long or kinked in the attic. The fan motor runs fine but moves almost no air, so it looks operational while moisture builds in the walls. Check the CFM rating on the fan and measure the bathroom’s square footage; if the fan is rated below 1 CFM per square foot, it needs an upgrade. Call (888) 419-3650 if you want someone to check the duct and sizing.
Cracking grout at 18 months is a sign of movement underneath, not a surface issue, and it should be covered by the contractor’s workmanship warranty if you’re within the 730-day window. Contact the original contractor in writing with photos and dates, and reference the warranty terms in the contract. If the contractor is unresponsive or the warranty window has closed, a moisture reading and a licensed inspection will tell you whether the waterproofing is compromised. Call (888) 419-3650 if you’d like a second opinion on the diagnosis.
Cosmetic repairs like re-grouting, re-caulking, or replacing a faucet don’t require a permit. Any repair that opens the wall, replaces a shower pan, moves plumbing, or replaces the waterproofing membrane generally does require a permit in Antioch, and the inspection is what confirms the waterproofing and plumbing were done correctly. Insist on the permit on any repair that goes deeper than the tile surface. Call (888) 419-3650 and we can tell you whether your specific repair is likely to trigger a permit.
The Bottom Line
Almost every bathroom remodel problem you’ll ever encounter traces back to one of three layers: the surface, the waterproofing, or the substrate. Fix the wrong layer and the problem returns. Fix the right layer, once, and the bathroom holds for decades. Diagnose with photos and a moisture meter, document the timeline, present it to the contractor in one organized message, and if the work is within warranty, hold them to it in writing. For homeowners in Antioch, the difference between a $300 repair and a $12,000 rebuild is usually caught in the first six months of symptoms, so don’t wait. If you want a second opinion on a bathroom remodel problem, or you’re planning a bathroom remodel and want to know it’s done right the first time, call Groundwork Construction Co. of Antioch at (888) 419-3650 for a free estimate. Our Fence Installation in Antioch and hardscape work are backed by the same 730-Day Done Right Promise, and every project comes with upfront pricing and no surprises.
Written by the team at Groundwork Construction Co. of Antioch.